Many of us have a love/hate relationship with our computers and digital cameras. We like what they can do but we find the technical aspects a bit daunting and it follows that we don't always achieve the best results. After all, who has the time to search manuals - we want to click and go!
Although a keen photographer for over 25 years, mostly with slide film, getting to grips with a digital SLR has been a steep learning curve for me. I doubt if I'll ever reach the summit but I'm proficient enough now to sell some of my images. I know lots of people struggle with some of the basics like image file types though and I thought I'd share my way of learning about the most commonly used file type in photography - the Jpeg.
JPEG stands for Joint Photographic Experts Group. What? A file saved as a Jpeg is a compressed file and it's a great tool because it enables us to send images around the world in lightening quick time. Image files are often huge and jam-packed with data and not only take up large amounts of storage space on our hard-drives but would take forever to upload on the web without this compression.
BUT ... and it's a big but ... this wonderful tool has issues!
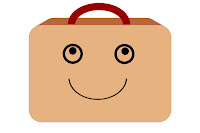 Think of a Jpeg file as a holiday suitcase. We've filled it up with all our best clothes but it won't shut properly so we have to discard some and then we have a nice neat case for travelling. On holiday we buy a few new things and some souvenirs but then when we come to fly home again our suitcase won't close. Some more things have to be thrown out. Every time we buy something new we have to make room for it!
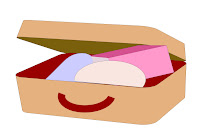 Bear with me ... if we now switch the analogy - so that the suitcase is our image and the contents become the data, by saving the image as a Jpeg we are effectively sitting on the suitcase to squish it down for travelling (compression). A few bits (or bytes) will have been thrown out but we're ready to go. Okay, so now we might want to open the image in Photoshop or Paint Shop Pro, etc, to brighten it up. This adds considerably to the image data and is like buying new things to put in the case. We hit the Save button again and once more the file is compressed - and more bits are discarded. Every time we hit that Save button on a Jpeg file it's throwing out data and it's doing it indiscriminately. It could be chucking out your favourite top or your new shoes - it doesn't care.
 Now, whether people edit their images or not, the vast majority of digital photographers shoot Jpeg images as a default method. Our cameras come set that way. It enables us to shoot lots of images onto our memory cards and that's good, isn't it. Isn't it? Well .... if you shoot at the lowest quality setting to give the highest number of images on your card, your card becomes a storeroom full of little squished suitcases. Quantity over quality. The compression is much greater at low settings and your photos might be disappointing when printed. Far better to always shoot at the highest quality Jpeg setting - that means minimum compression and happier photographers. After all, memory cards have come down greatly in price now, so buy more storage. Because you're worth it.
Although a keen photographer for over 25 years, mostly with slide film, getting to grips with a digital SLR has been a steep learning curve for me. I doubt if I'll ever reach the summit but I'm proficient enough now to sell some of my images. I know lots of people struggle with some of the basics like image file types though and I thought I'd share my way of learning about the most commonly used file type in photography - the Jpeg.
JPEG stands for Joint Photographic Experts Group. What? A file saved as a Jpeg is a compressed file and it's a great tool because it enables us to send images around the world in lightening quick time. Image files are often huge and jam-packed with data and not only take up large amounts of storage space on our hard-drives but would take forever to upload on the web without this compression.
BUT ... and it's a big but ... this wonderful tool has issues!
 Think of a Jpeg file as a holiday suitcase. We've filled it up with all our best clothes but it won't shut properly so we have to discard some and then we have a nice neat case for travelling. On holiday we buy a few new things and some souvenirs but then when we come to fly home again our suitcase won't close. Some more things have to be thrown out. Every time we buy something new we have to make room for it!
 Bear with me ... if we now switch the analogy - so that the suitcase is our image and the contents become the data, by saving the image as a Jpeg we are effectively sitting on the suitcase to squish it down for travelling (compression). A few bits (or bytes) will have been thrown out but we're ready to go. Okay, so now we might want to open the image in Photoshop or Paint Shop Pro, etc, to brighten it up. This adds considerably to the image data and is like buying new things to put in the case. We hit the Save button again and once more the file is compressed - and more bits are discarded. Every time we hit that Save button on a Jpeg file it's throwing out data and it's doing it indiscriminately. It could be chucking out your favourite top or your new shoes - it doesn't care.
 Now, whether people edit their images or not, the vast majority of digital photographers shoot Jpeg images as a default method. Our cameras come set that way. It enables us to shoot lots of images onto our memory cards and that's good, isn't it. Isn't it? Well .... if you shoot at the lowest quality setting to give the highest number of images on your card, your card becomes a storeroom full of little squished suitcases. Quantity over quality. The compression is much greater at low settings and your photos might be disappointing when printed. Far better to always shoot at the highest quality Jpeg setting - that means minimum compression and happier photographers. After all, memory cards have come down greatly in price now, so buy more storage. Because you're worth it.
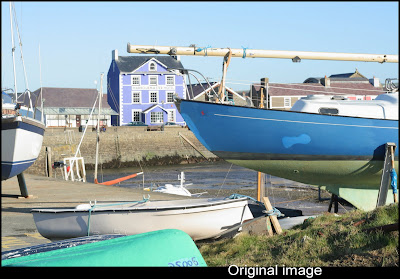
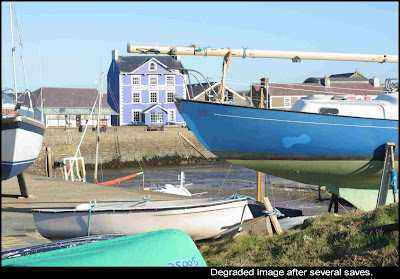
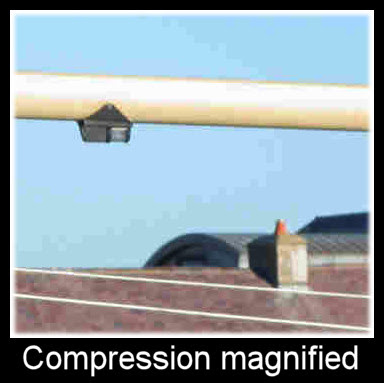
Above is a photo showing a before and after Jpeg compression, after several saves. Hopefully you can see how the image has degraded - look in particular at the sky area, where the colours have separated or posterised. Below I've shown a close crop from the same image. Those horrid blocky bits are known as artifacts. Sounds like something the Time Team would dig up - just not nearly as helpful!
If you do edit your images, make sure, when you open them in your software such as Photoshop, that you hit Save As and save a copy of your file to work on in the native file format. (.psd for Photoshop; psp image for Paint Shop Pro, etc, etc) then you can save as many times as you need to without degrading it. If it's to be uploaded on the web, then export the file as a Jpeg right at the end of the process, at minimum compression.
This is just my way of learning about Jpegs and not meant as a technical guide - the whole subject is much more complex than I can cope with. I hope it goes some way to helping you too.
Happy snapping!


6 comments:
Oh my goodness! I don't think I can cope with JPEGS. My camera does it automatically. But now you have shown me the difference in quality I have to look out my camera manual and see how I can change the settings. Thank you for this info, I had NO IDEA about any of this, I just point and shoot. This is very informative.
Wow Madge that's great! Really helpful & informative. No wonder I get so exhaustd messing with piccies on the pc - it's because I'm packing & unpacking suitcases all day :)
WOWZER Madge!!I didn't know about this either - thank you for the very easily read breakdown on this!
I just had to go and get a couple of photographs to compare and yes.. there is a big difference. Many thanks for this information which has been saved for future reference.
Crikey! I'm going to have to read this through a few times to get to grips with it all but I can certainly see the difference in the pictures. Thanks for this. :D
Now that was a clever and easy way to explain the basic principles of editing Jpegs, brilliant!
Post a Comment